iOS 8 Camera Basics
Camera is one of the most essential iOS apps. Thanks to the ever-improving quality of iOS cameras, many people have abandoned standalone cameras entirely, instead using their iOS devices to capture cherished moments.
To take a photo (or video), start by figuring out the meaning of the icons on the main Camera screen ①.
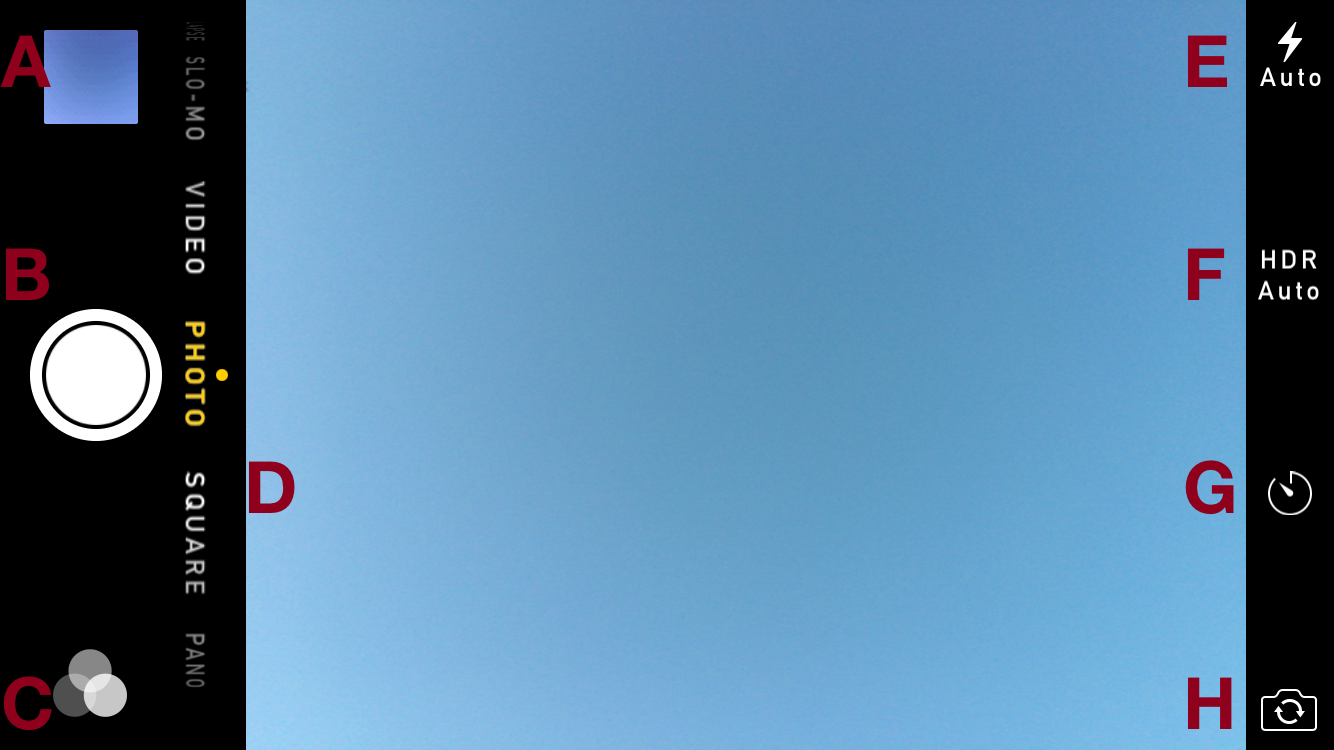
① Here’s a look at the Camera controls on an iPhone (the iPod touch is similar): (A) Photo and Video Viewer, (B) Take Picture (shutter), (C) Filters, (D) Viewfinder, (E) Flash, (F) HDR, (G) Timer, and (H) Camera Chooser. Camera on the iPad has similar controls, but a different layout.
Picking a Camera Mode
Before you press the round Take Picture button (B), above, you’ll want to set up your shot. Start by picking a mode.
The mode is indicated by a yellow label next to the Take Picture button.
You switch between modes by swiping across the Viewfinder (vertically if your device is in landscape orientation, as shown above), or by tapping a label.
Camera Mode Descriptions
- Time-Lapse: The camera snaps a series of images at dynamically selected intervals. It then combines the images into a time-lapse video (see Taking a Time-Lapse Video).
- Slo-Mo: On supported devices, this mode records video at 120 frames per second (fps) (or up to 240 fps on the iPhone 6 and 6 Plus). During playback, you can choose a snippet of this high-frame-rate video to be played in slow motion (at the normal rate of 30 fps).
- Video: This mode lets you record video at 30 fps. On the iPhone 6 and 6 Plus, tap Settings > Photos & Camera to switch to 60 fps. (See Taking a Video.)
- Photo: This mode takes standard rectangular photos.
- Square: In this mode, the camera takes square, Instagram-friendly images ②.
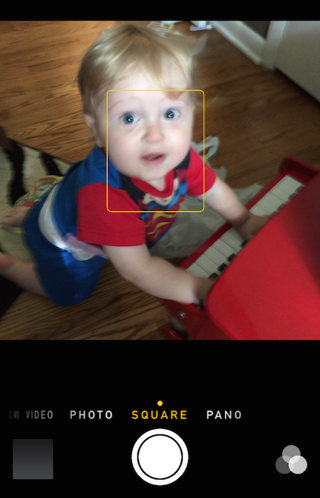
② The Square camera mode takes square photos, which are perfect for certain photo sharing services—that is, if you can get your infant to remain still.
- Pano: The camera takes a continuous stream of photos as you move the device horizontally, and then it stitches those images together to create a super-wide image—perfect for capturing landscapes. Follow the onscreen instructions to make the perfect panorama ③.
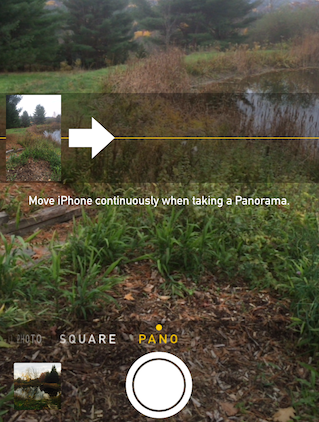
③ When taking a panorama, you must move the device slowly and steadily from one side to the other.
Camera Options
In addition to shooting modes, the Camera app provides a number of options for taking and tweaking photos:
- Flash: On devices with a rear flash, tap this button to disable the flash (Off), enable it for all photos (On), or let Camera make the decision for you, depending on lighting.
- HDR: High dynamic range imaging, or HDR, is a way to capture more light in a photo by taking several photos and combining them into one. When HDR is enabled, Camera takes two photos with different exposures and automatically combines them to produce, in theory, a better final image.
- Time delay: Tap this
 button to set a 3- or 10-second timer—then tap the Take Picture button, get in position, and smile. Photos displays a countdown and flashes the camera flash to indicate how much time is left before the picture is taken ④.
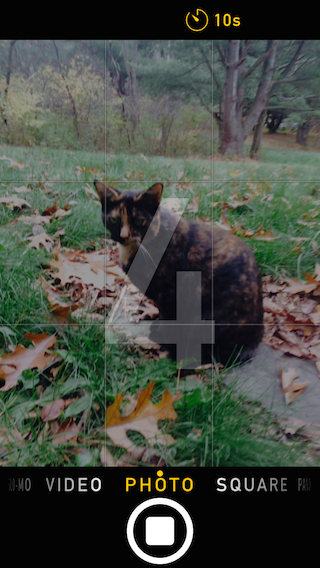
④ To take a time-delay photo, enable the timer, tap the Take Picture button, and wait for the countdown to finish.
- Camera Chooser: Tap this button to toggle between the front and rear cameras—the former being perfect for taking selfies. During a FaceTime call, tapping this button switches to the rear camera so you can show the person at the other end of the call what you’re seeing.
- Filters: Tap the Filters button to see the nine effects you can apply to your photo as it is being taken. You see a preview of all filters at once; tap the one you want to use ⑤.
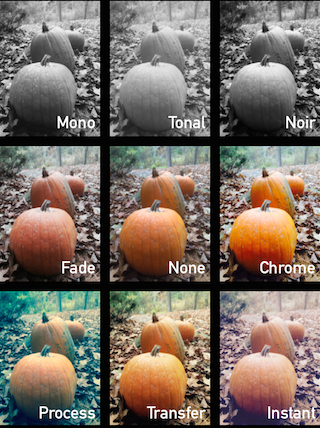
⑤ You can apply one of these filters to your photo as you shoot it. Don’t worry if you don’t like the result, because you can remove the filter later.
Snapping a Photo
- Switch to the desired camera mode.
- Make sure you’ve turned on (or off) any of the options described above, like the timer or flash.
- Tap an object in the Viewfinder to focus on it. A square reticule appears, indicating where the camera is focusing. Slide your finger up or down the screen to adjust exposure ⑥.
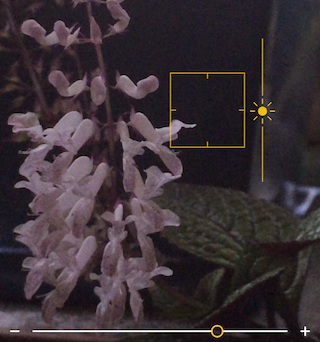
⑥ Tap the Viewfinder to reveal the square focus reticle, which indicates where the camera is focused.
To zoom in or out, pinch in or out on the screen. A slider appears to show the zoom level; once visible, you can adjust it manually as well.
- Take the photo: tap the Take Picture button or press either of your device’s volume buttons.
Your photo is saved to the Photos app in Albums > Camera Roll. A burst-mode photo appears under a single thumbnail; tap it, and then tap Select to see all photos in the series.
Taking a Video
- If possible, set the device on a stable surface, or use a tripod.
- Switch to Video mode.
- To begin recording, tap the large red button or press either of your device’s volume buttons.
A counter at the top of the screen lets you know how long you’ve been recording.
- Tap the red button again to stop recording ⑦.
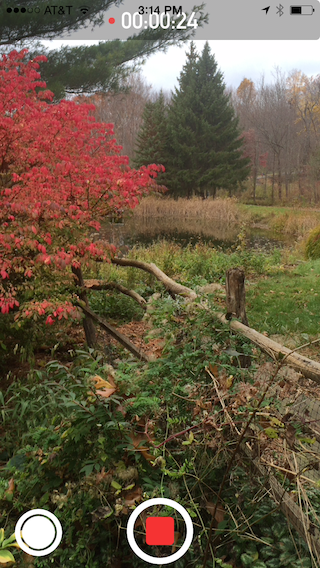
⑦ While recording video, tap the red button to stop taking video, or the white Take Picture button to snap a photo while continuing to shoot video.
Your video is saved in the Photos app, in Albums > Videos.
Taking a Time-Lapse Video
- Try to rest the device on a ledge or other solid base, or use a tripod.
- Switch to Time-Lapse mode.
- Tap the red Take Picture button or press either of your device’s volume buttons, and hold the camera still.
- The camera starts shooting and continues until your device runs out of space or battery, or until you press the red Take Picture button again to stop it ⑧.
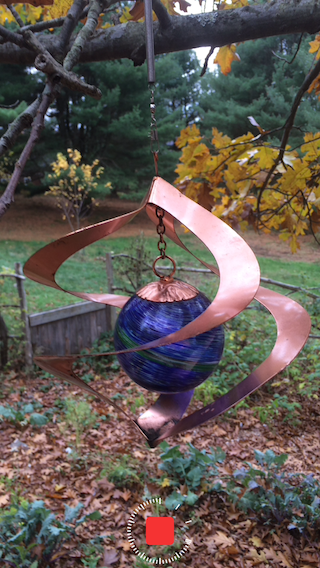
⑧ While you take a time-lapse video, a ticker appears around the Take Picture button, which morphs into a stop button. Tap it to stop taking a time-lapse video.
The Camera app stitches the images together to make a time-lapse video. You can find the video in the Photos app, in Albums > Videos.
Copyright © 2014, Josh Centers. All rights reserved.


 button to set a 3- or 10-second timer—then tap the Take Picture button, get in position, and smile. Photos displays a countdown and flashes the camera flash to indicate how much time is left before the picture is taken ④.


