If your Mac connects to the Internet via an Ethernet cable, it can create its own Wi-Fi hotspot to share that connection with another Mac, an iOS device, or any other device with Wi-Fi. In other words, it acts as a software base station.
However, note the following qualifications:
Your Mac can’t re-share an existing Wi-Fi connection. But if you happen to have an Internet connection through another hardware port (a Thunderbolt or FireWire port, for example, or a USB-to-Ethernet adapter), it can share that connection.
The range and throughput of your Mac-created Wi-Fi network won’t be as good as what you would get from a stand-alone Wi-Fi router, such as an AirPort Express.
Enable Internet Sharing
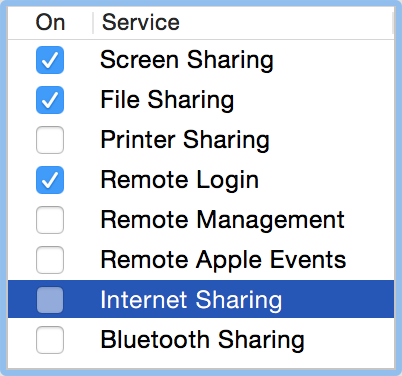
Go to System Preferences > Sharing.
Select Internet Sharing in the list on the left ①. (You can’t select the checkbox itself until you’ve completed a few more steps.)
① Select Internet Sharing to start—but you can’t check the box (yet).
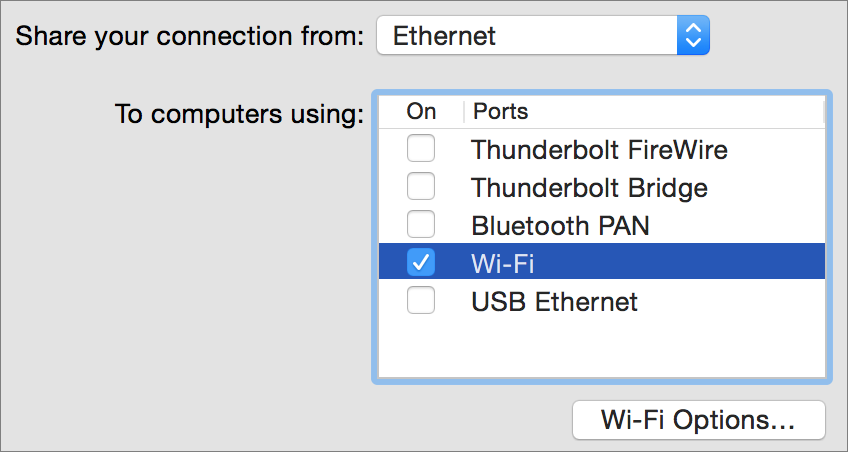
On the right, from the Share Your Connection From pop-up menu, choose Ethernet (or whichever other hard-wired connection your Mac uses for Internet access).
In the To Computers Using box, select the Wi-Fi checkbox ②.
② Share an Ethernet connection over Wi-Fi.
Click Wi-Fi Options, choose a network name and channel (or just keep the defaults), choose WPA2 Personal from the Security pop-up menu, and enter (and confirm) a password. Click OK.
Select the checkbox next to Internet Sharing on the left.
Your Mac’s Internet connection is now shared via Wi-Fi.
Connect from Another Device
Once your Mac is sharing its Internet connection over Wi-Fi, the network name you chose in Step 5, previously, should appear in the Wi-Fi menus of all nearby devices.
On a Mac, choose the network name from the Wi-Fi menu to connect. Enter the password when prompted.
On an iOS device, tap Settings > Wi-Fi, tap the network name, and enter the password when prompted.