Get Help from OS X Recovery
Maybe the trouble begins with errors when you try to save or open a file. Or, you might find yourself staring at an unchanging gray screen. When your Mac is on the fritz, your first instinct may be to launch Apple’s Disk Utility and select Repair Disk from the First Aid pane. The problem is, Disk Utility can’t repair an active startup drive. So, what now? When you installed Yosemite, you also gained a hidden partition made just for such moments. Here’s when—and how—to use OS X Recovery ①.

① When you boot into Apple’s Recovery mode, you can access a number of troubleshooting tools.
First, Try Basic Troubleshooting
OS X Recovery can be a life-saver, but using it shouldn’t be the first step when you’re troubleshooting your Mac. Make sure you’ve exhausted easy options first. Here’s the least you need to know.
Zap a Frozen App
Is your problem the dreaded, endlessly spinning beach ball? Try these tricks before more drastic methods:
- Force Quit: First see if the problem is limited to one app. Try to switch to another by clicking its Dock icon or pressing Command-Tab to use the Application Switcher. If other apps respond, you’ll want to force the offending on to quit. Choose Apple > Force Quit (or press Command-Option-Esc) ②. Select the bad app in the list, and then click Force-Quit. Usually an app will behave once relaunched.
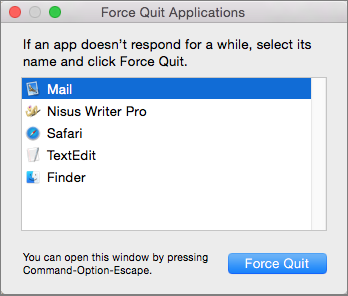
② Press Command-Option-Esc to force-quit a stalled application.
- Restart your Mac: If you can’t force-quit, choose Apple > Restart. If that fails, press Command-Control-Eject to force a restart (with the opportunity to save unsaved work first). If that doesn’t work, press and hold your Mac’s Power button until the Mac shuts down (unfortunately, losing any unsaved work), and then press it again to restart.
- Log in with your troubleshooting account: Still having trouble? Log in with your troubleshooting account to see if the problem is limited to your user account. (See Create a Troubleshooting Account, in the previous chapter, for details.)
Solve Slowdowns
If force-quitting and restarting doesn’t stop your slowdown problems, you might need to do more:
- Update your software: If your problem is a bug, a software update may help. Go to Apple > App Store and click Updates to check for, and then download, new versions of software from the App store (including OS X itself). Check vendor Web sites for apps you got elsewhere.
- Free up disk space: If your disk is nearly full, your Mac may run slowly. To see what files are hogging your megabytes, try an app like Id-design’s WhatSize.
- Add RAM: Yosemite demands a lot of RAM; if everything is running slowly, and it’s not due to a full drive, you might need more. To see how much you have, choose Apple > About This Mac and click Memory ③. If it’s possible to add more RAM, click the Memory Upgrade Instructions link. Or, see Crucial’s step-by-step guides.
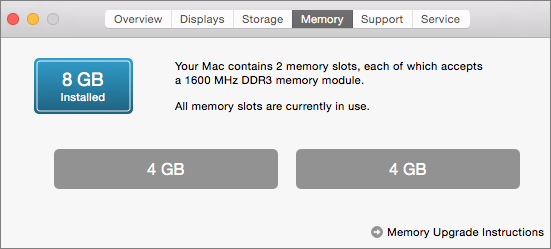
③ See how much RAM you have and whether you can add more.
Tame Troubled Startups
For problems with startups, try these tricks first:
- Unplug peripherals: If you’re having trouble at startup, peripherals might be to blame. (In my case, my trusty Kinesis Advantage keyboard was the culprit.) Unplug everything and restart to see what happens. If your Mac starts up with no problem, test your peripherals one by one. If the evidence points to a device, update its software or contact the manufacturer for help.
- Try Safe Boot: Other startup problems might be solved by a Safe Boot. Restart your Mac and press and hold the Shift key until the gray Apple logo appears. This disables software that loads at startup and runs some clean-up processes. If the problem goes away, restart again normally.
Turn to OS X Recovery
If your attempts to fix your Mac aren’t working or you think you need to repair your drive, boot your Mac into OS X Recovery: Hold down Command-R at startup until the Apple logo appears. Or, press and hold Command-Option-R at startup to see the Startup Manager, and select Recovery HD from there.
In OS X Recovery, you see four choices: Get Help Online, Disk Utility, Restore From Time Machine Backup, and Reinstall OS X.
Get Help Online
If you’re not sure what to do, start here. First, make sure you’re connected to the Internet by clicking the Wi-Fi icon at the top right of the screen and choosing a network ④. Enter the network’s password, if necessary. Then, choose Get Help Online and click Continue.
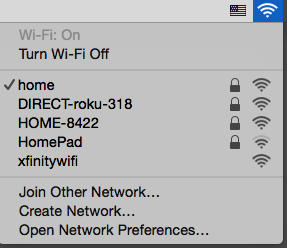
④ Click the Wi-Fi icon in the menu bar to connect to the Internet.
Safari opens to a description of how to use OS X Recovery. Click the link to the general Apple Support site, click the Mac category, and then browse help topics. Or, click the search icon and type a description of your problem to see if fixes turn up. You may also want to do a more general Google search.
Repair with Disk Utility
If you’re in Recovery mode because of disk problems, Disk Utility is the option you’ll choose first. After the utility launches, select your startup drive’s name in the list on the left. Click the First Aid button and then click the Repair Disk button ⑤.

⑤ Once in Recovery mode, you can select your startup drive and click Repair Drive (circled).
If Disk Utility repairs your drive—or can’t find problems to repair—but the problem still occurs, try reinstalling OS X.
If Disk Utility can’t repair the drive:
Reinstall OS X
Sometimes your copy of OS X is the problem and you’ll need to install it anew. You can do this, in theory, without harming your files and settings.
For this option to work in OS X Recovery, you must be connected to the Internet. Click the Wi-Fi icon at the top right of the screen and choose a network. Enter the network’s password, if necessary.
Choose Reinstall OS X and click Continue. OS X downloads over the Internet from Apple’s servers, and is installed. Be prepared for this to take anywhere from 20 minutes to several hours, depending on your connection.
Restore from a Time Machine Backup
Say the worst has happened and you must wipe your drive and start fresh (or install a new drive). If you back up your data using OS X’s Time Machine, then you can restore your system—OS, files, and all—using the Restore from Time Machine option ⑥.
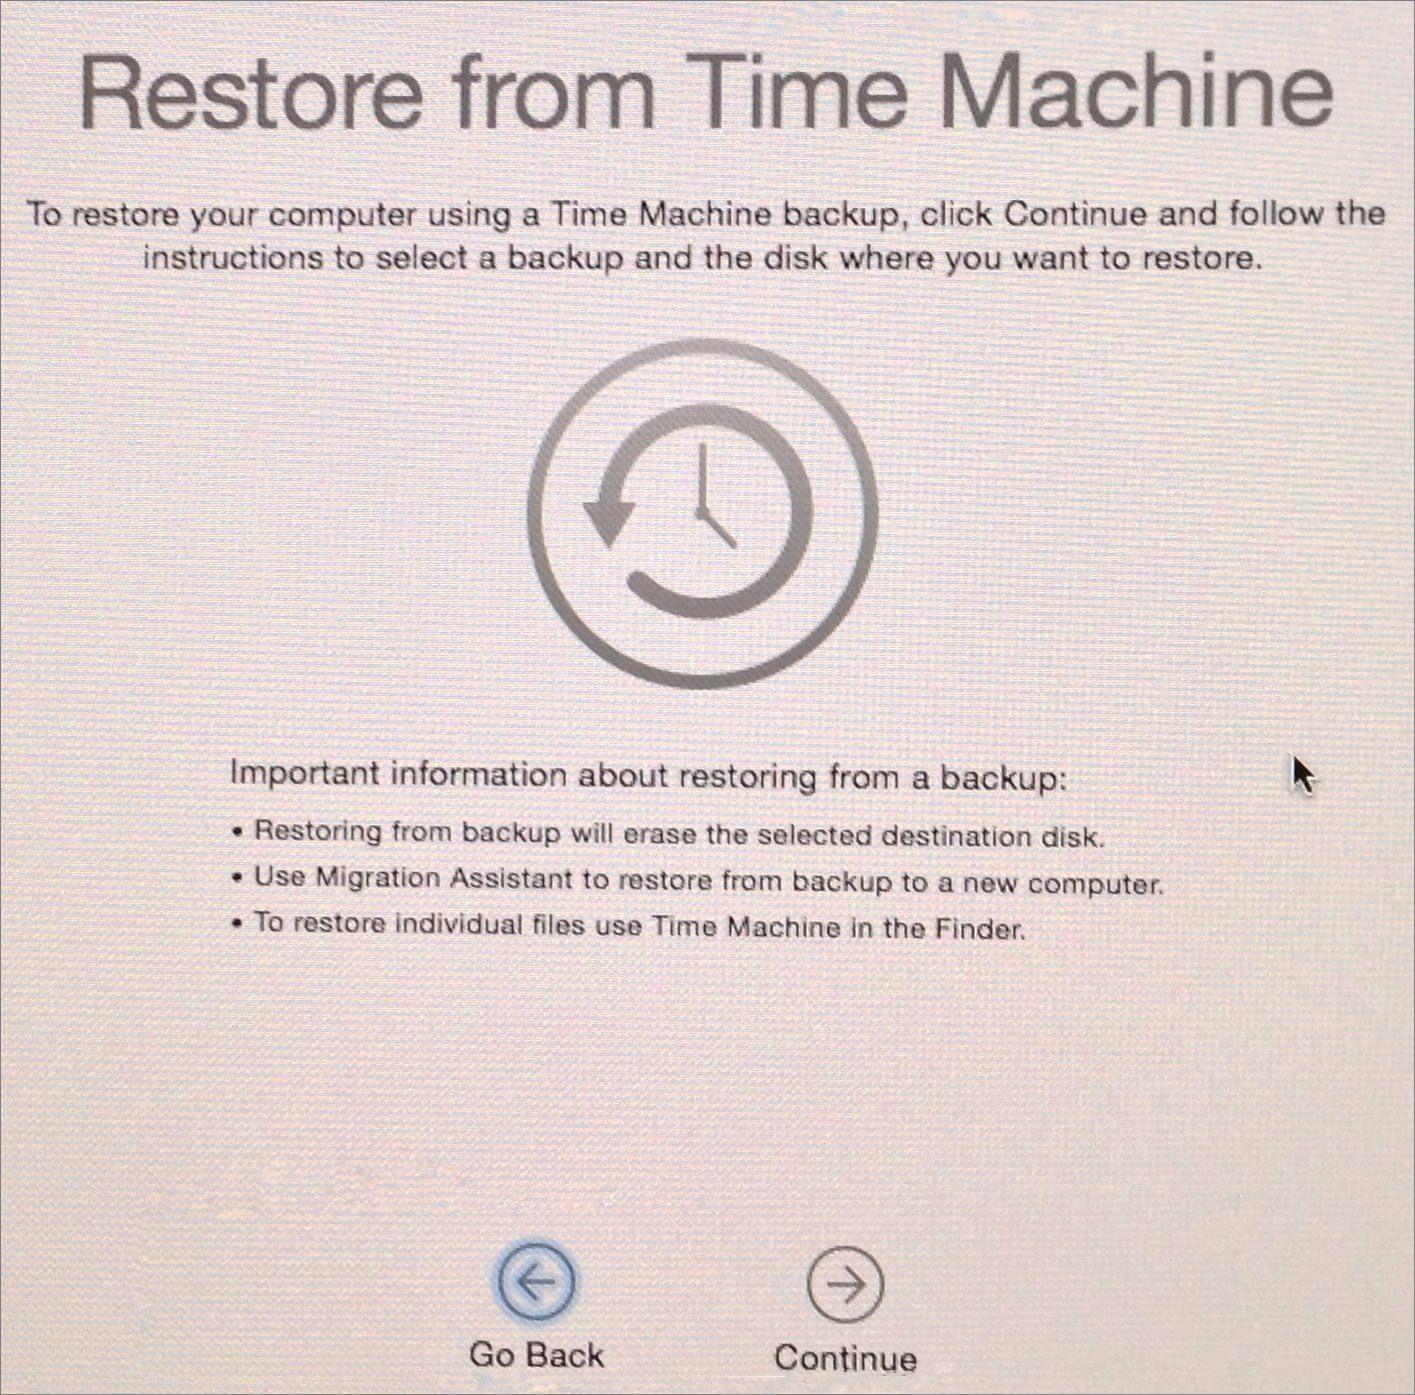
⑥ If you have complete Time Machine backups, the Restore From Time Machine option may save your bacon.
Assuming you have a complete Time Machine backup (see the warning above), and you want to wipe the destination drive clean and restore your backup to that drive, select Restore from Time Machine Backup and then click Continue.
On the next screen, select your Time Machine drive, the particular backup you want to restore from, and the destination drive.
Erase and Reinstall OS X
If you’re sure that you don’t need a new drive, but you want to start from scratch, you can erase the disk and reinstall a fresh copy of OS X.
Boot into OS X Recovery, choose Disk Utility, and click Continue.
After the utility launches, select your startup drive’s name in the list on the left. Click the Erase button. In the Format pop-up menu, choose Mac OS Extended (Journaled), name your disk if you like, and click…(you’re sure, right?)… Erase.
Once this process is done, go back to the Reinstall OS X section and follow the directions there.
Copyright © 2014, Sawyer McFarland Editing. All rights reserved.
